Using Jenkins with E3SM
This page details the configurations that are most commonly used for Jenkins jobs that are in use at Sandia Labs. Of course, if appropriate, other configurations not covered in this page may need to be set.
- Create a new Freestyle Project, or you may also clone an existing Jenkins job.
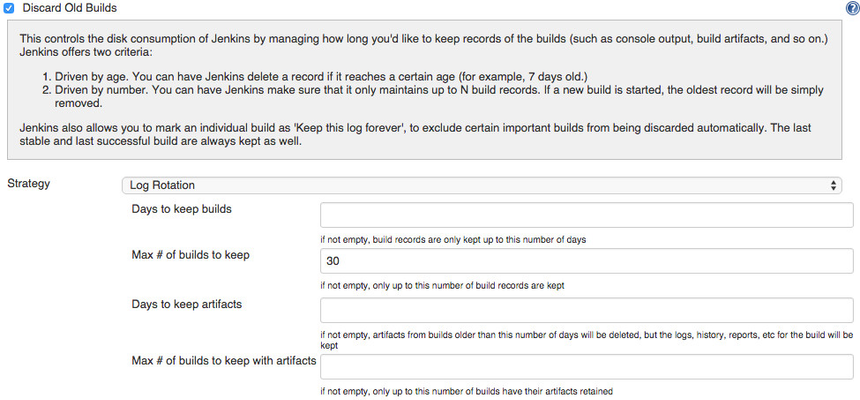
- Determine whether or not to Discard Old Builds. In the example below, we checked the box named "Discard Old Builds" and designated that only 30 builds be kept by entering that number into the field named "Max # of builds to keep."
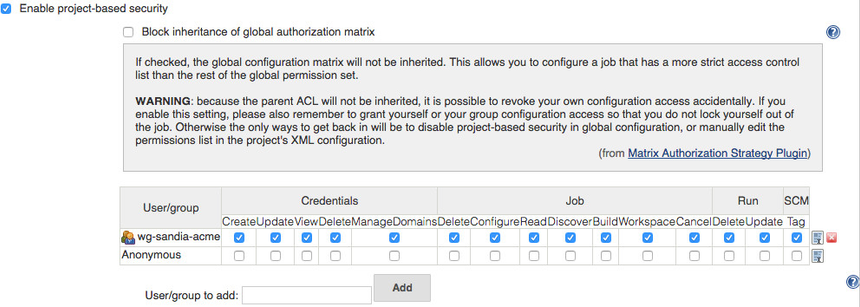
- Depending upon which Jenkins instance is being used, you may need to Determine whether or not Enable project-based security. In the example below, we checked the box named "Enable project-based security" and added a metagroup to secure the project and assign permissions.
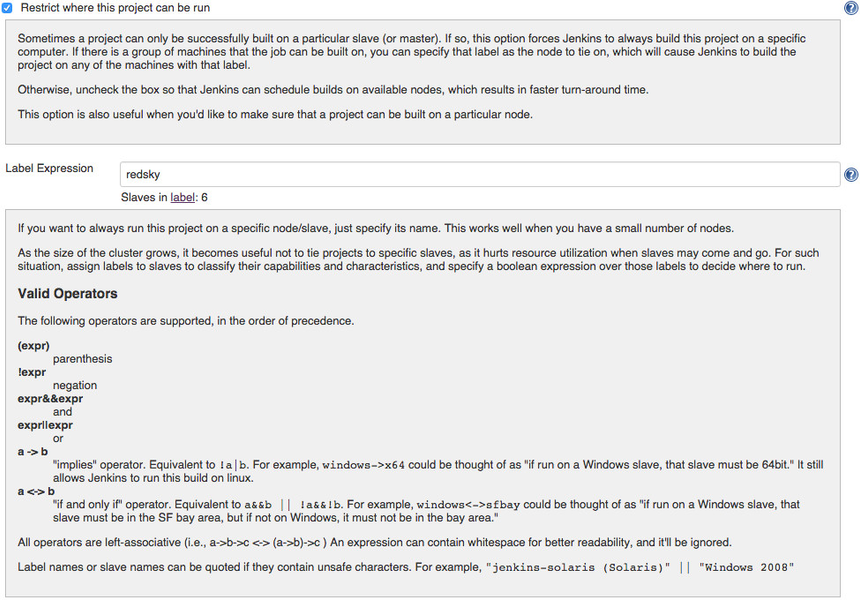
- Determine whether or not to Restrict where the project can be run. In the example below, we checked the box named "Restrict where this project can be run" and entered a "Label Expression" of "redsky." The project can only be run on the machine named "redsky."
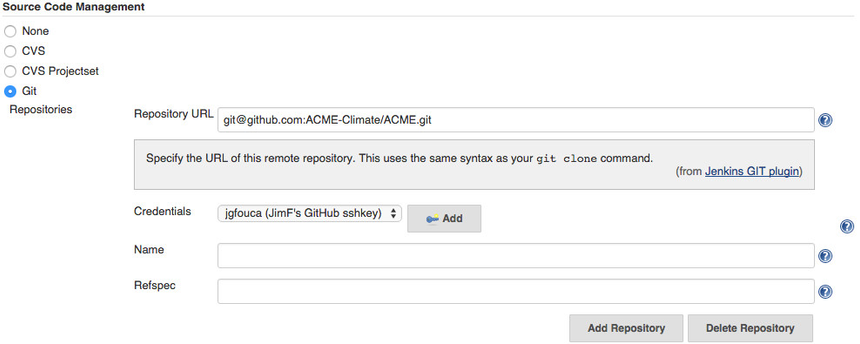
- Under the section named "Source Code Management," in the example below we selected the "Git" radio button because our code is under configuration management within a Git repo. One must provide the url to the repo, and also add any credential (sshkey) that is valid. In the example below, the repo url is git@github.com:ACME-Climate/ACME.git, and the credential that was added is Jim Foucar's GitHub sshkey.
Specify a branch of the repo to track. In the example below, we used the value Jenkins provided by default, which is " */master "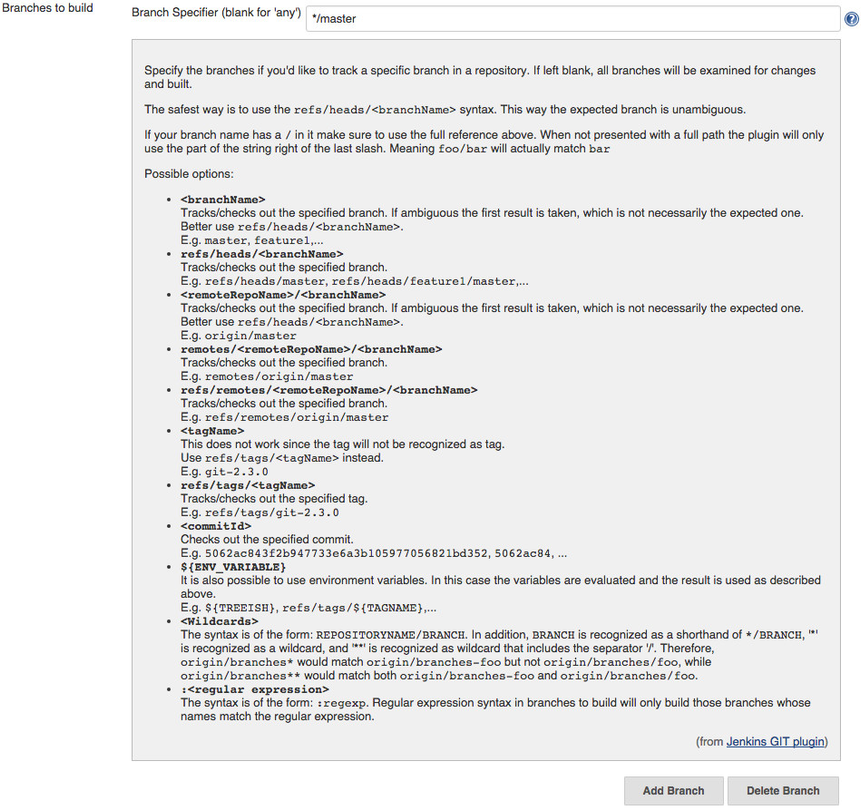
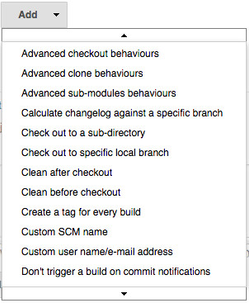
- Under the section named "Additional Behaviours," add both "Check out to a sub-directory" and "Advanced sub-modules behaviours." Click the "Add" drop-down button as shown below.
In the example below, ACME has been designated as the local subdirectory where the Git repo will be checked out. Additionally, submodules processing has been disabled by checking the box.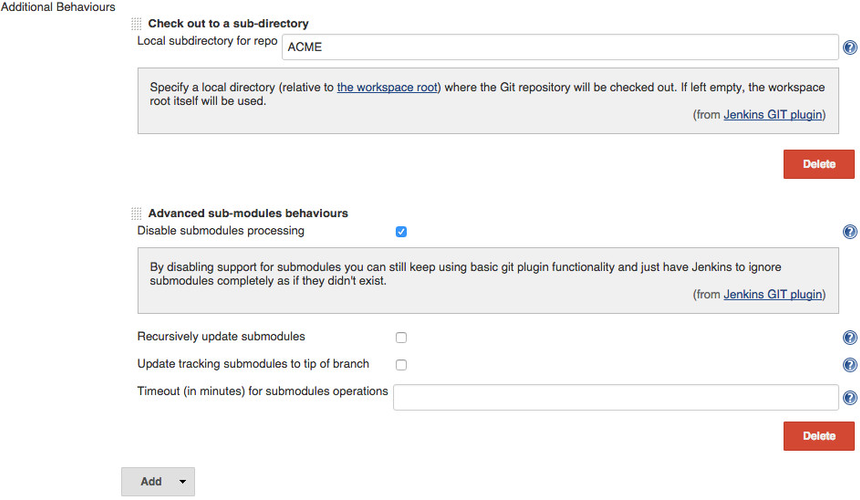
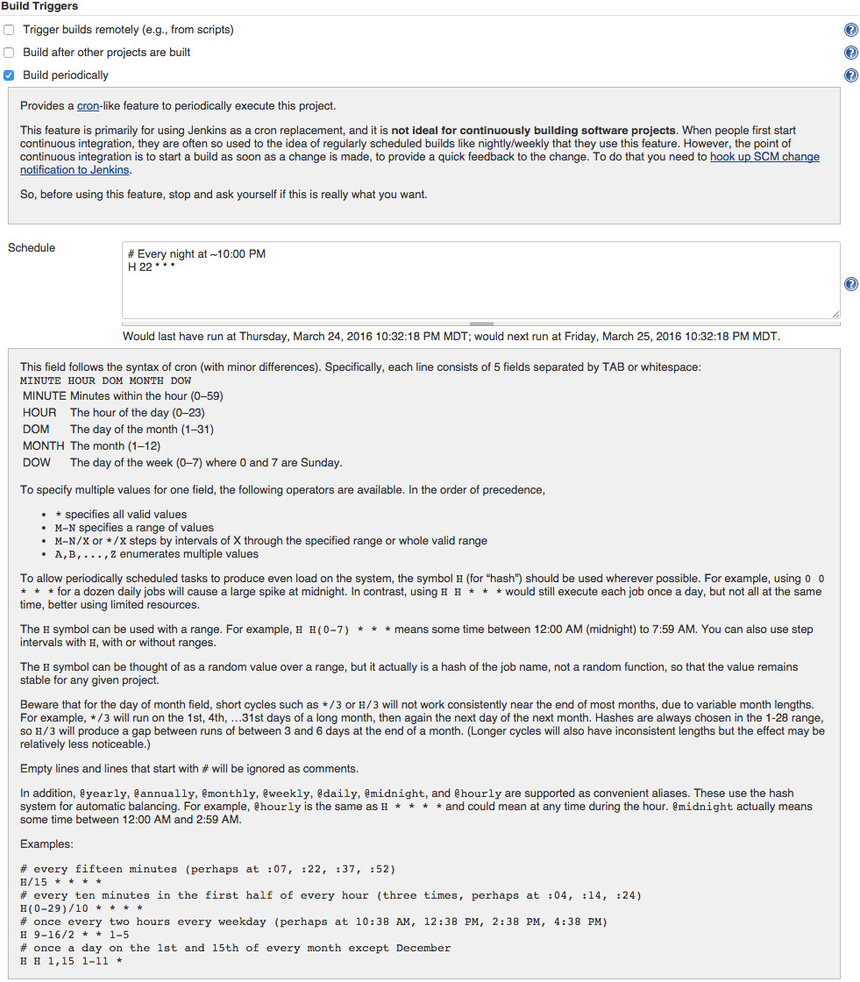
- Under the section named "Build Triggers," check the box named "Build periodically." In the example below, the "Schedule" is set for a run at 10:00 PM every night.
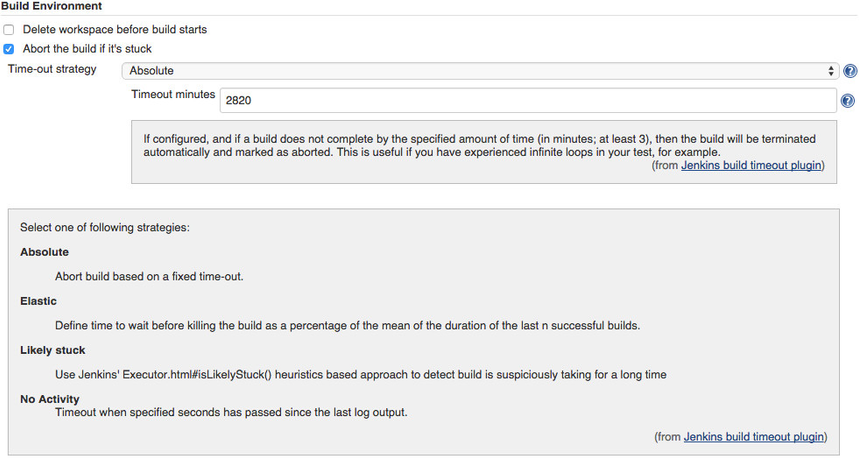
- Under the section named "Build Environment," check the box named "Abort the build if it's stuck." Select "Absolute" from the drop-down menu named "Time-out strategy." In the example below, the "Timeout minutes" field has been given a value of 2820 minutes.
Next to the field named "Time-out actions" click the "Add action" drop-down button and select "Fail the build."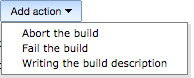
After "Fail the build" is selected and added, one will see the following: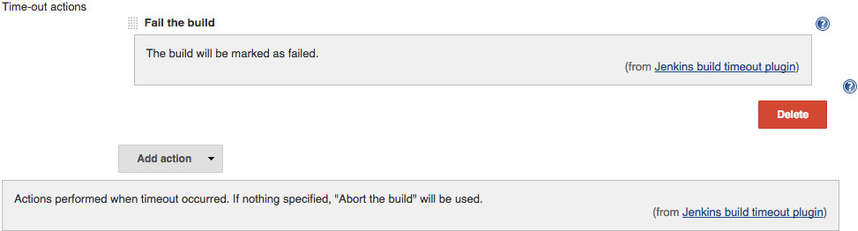
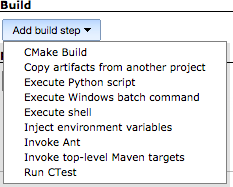
- Under the section named "Build," for the example below, we clicked the "Add build step" drop-down button and selected "Execute shell."
After making selections from the the "Add build step" drop-down button, one is then presented with a textbox named "Command." In our example code shown below, notice that we have erased the user's password following the "jgfouca:"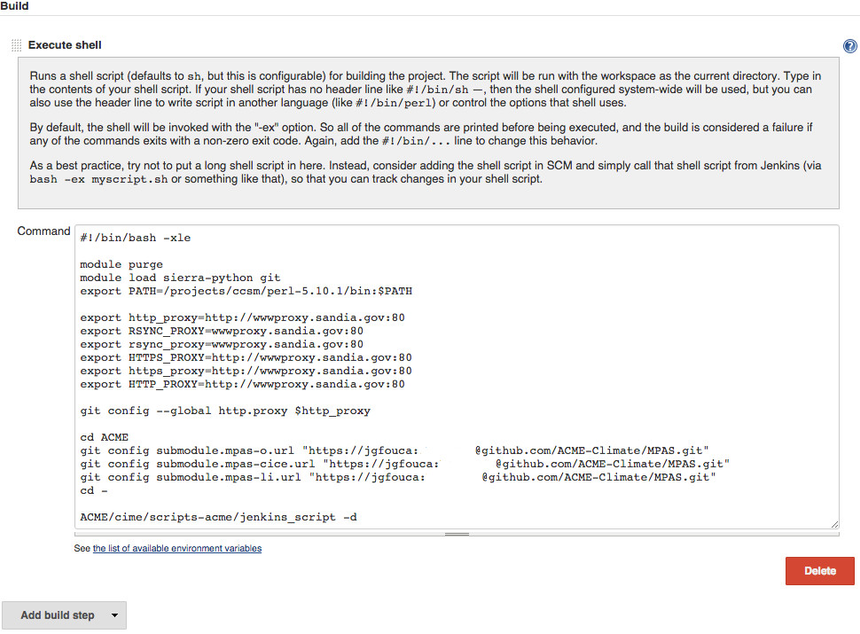
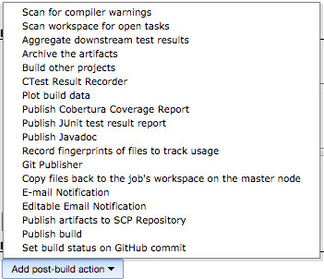
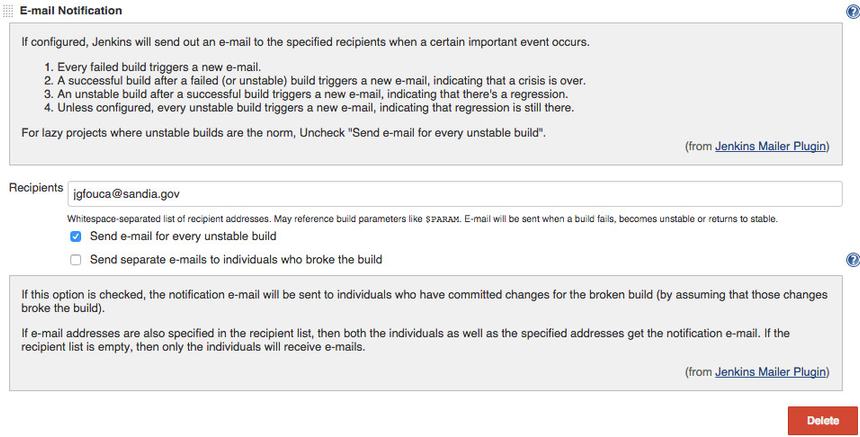
- Under the section named "Post-build Actions," for the example below, we clicked the "Add post-build action" drop-down button and selected "E-mail notification" so we could be notified when certain important events occur. For the example below, we were presented the following, and we entered a valid email address and checked the box named "Send e-mail for every unstable build."
- Click the "Save" button.